
How to Clone a ElasticSearch Helm Release on GKE


Robin Storage on Google Marketplace
In this tutorial, we will create a clone of the ElasticSearch database that has been deployed on Google Kubernetes Engine (GKE). Then we will make changes to the clone and verify that the original database has remained unaffected by changes that were done to the clone.
Before starting with this tutorial, make sure Robin Storage is installed on GKE, your ElasticSearch database is deployed, has data loaded in it, and the Helm release is registered with Robin, and you have taken a snapshot of your ElasticSearch Helm release.
Create a clone of the Elasticsearch Helm Release on GKE
Application cloning improves the collaboration across Dev/Test/Ops teams. Teams can share app+data quickly, reducing the procedural delays involved in re-creating environments. Each team can work on their clone without affecting other teams. Clones are useful when you want to run a report on a database without affecting the source database application, or for performing UAT tests or for validating patches before applying them to the production database, etc.
Robin clones are ready-to-use “thin copy” of the entire app/database, not just storage volumes. Thin-copy means that data from the snapshot is NOT physically copied, therefore clones can be made very quickly. Robin clones are fully-writable and any modifications made to the clone are not visible to the source app/database.
Robin lets you clone not just the storage volumes (PVCs) but the entire database application including all its resources such as Pods, StatefulSets, PVCs, Services, ConfigMaps, etc. with a single command.
To create a clone from the existing snapshot created above, run the following command. Use the snapshot id from the snapshot tutorial shown below.
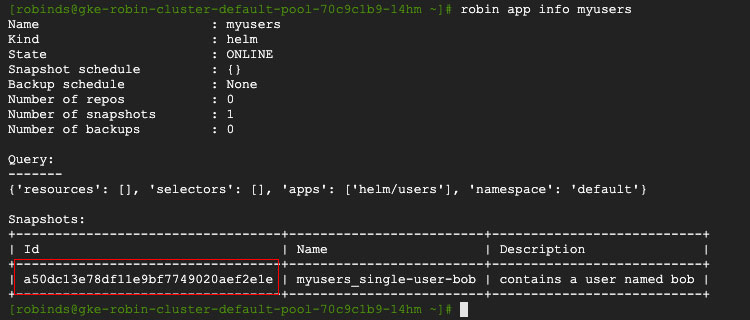
robin clone create my-users-clone Your_Snapshot_ID --wait
Let’s verify Robin has cloned all relevant Kubernetes resources by running the following command.
robin app status --app my-users-clone
You should see an output similar to below.
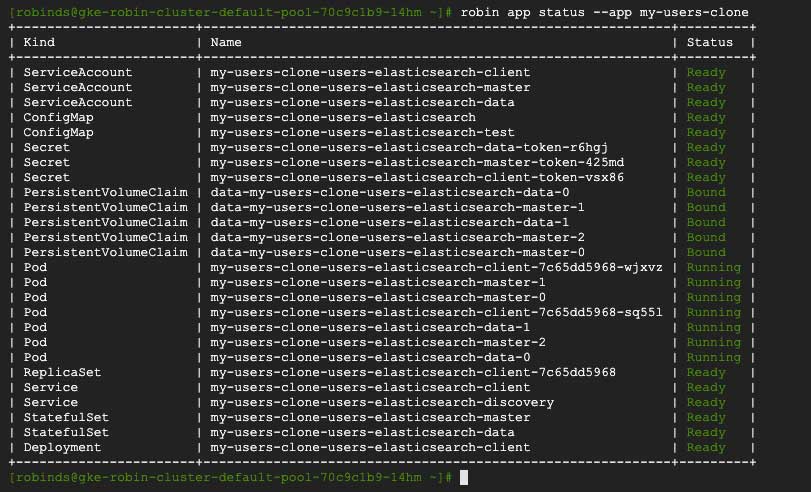
Notice that Robin automatically clones all the required Kubernetes resources, not just storage volumes (PVCs), that are required to stand up a fully-functional clone of our database. After the clone is complete, the cloned database is ready for use.
Get the name of the client pod of your cloned ElasticSearch database by running the following command:
export CLONE_CLIENT_ADDRESS=$(kubectl get pods --all-namespaces --field-selector=status.phase=Running | grep clone-users-elasticsearch-client -m 1| awk 'BEGIN {FS=" "}; {print $2}')
To verify we have successfully created a clone of our ElasticSearch database, run the following command.
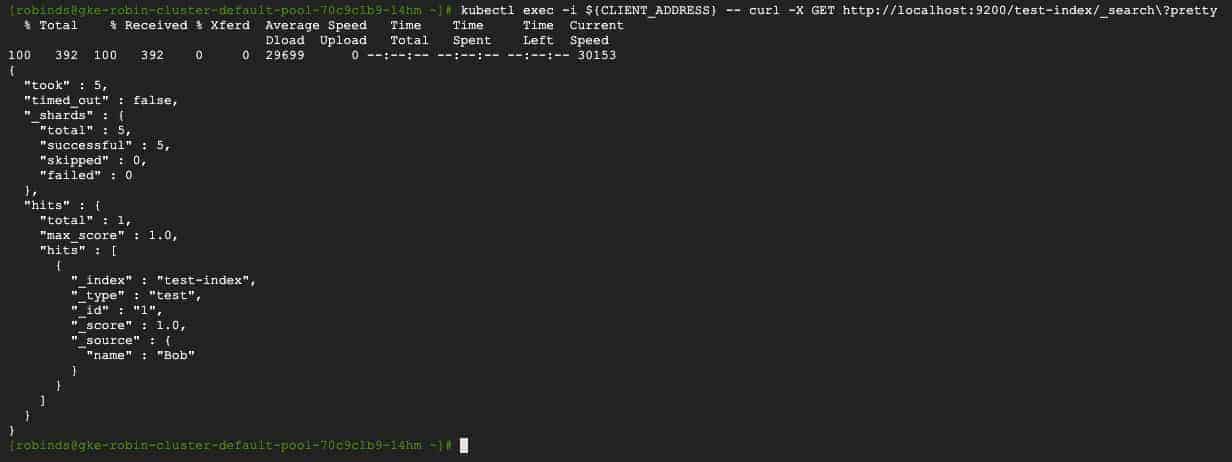
kubectl exec -i ${CLONE_CLIENT_ADDRESS} -- curl -X GET http://localhost:9200/test-index/_search?pretty
You should see an output similar to the following.
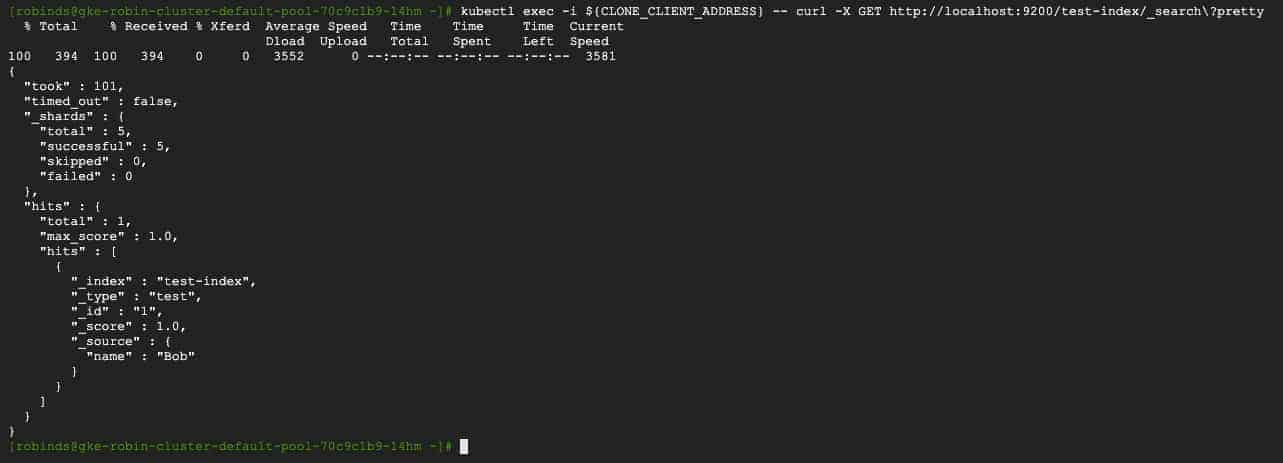
We have successfully created a clone of our original ElasticSearch database, and the cloned database also has an index called ‘test-index’ with our original user ‘Bob’. Thus it is identical to our original database.
Now, let us make changes to the clone and verify the original database remains unaffected by changes to the clone. Let’s add a user called ‘Sarah’ by running the following command:
kubectl exec -i ${CLONE_CLIENT_ADDRESS} -- curl -H 'Content-Type: application/json' -XPOST http://localhost:9200/test-index/test/2 -d '{"name":"Sarah"}'
Let’s verify the second user has been added.
kubectl exec -i ${CLONE_CLIENT_ADDRESS} -- curl -X GET http://localhost:9200/test-index/_search?pretty
You should see an output similar to the following with 2 records.
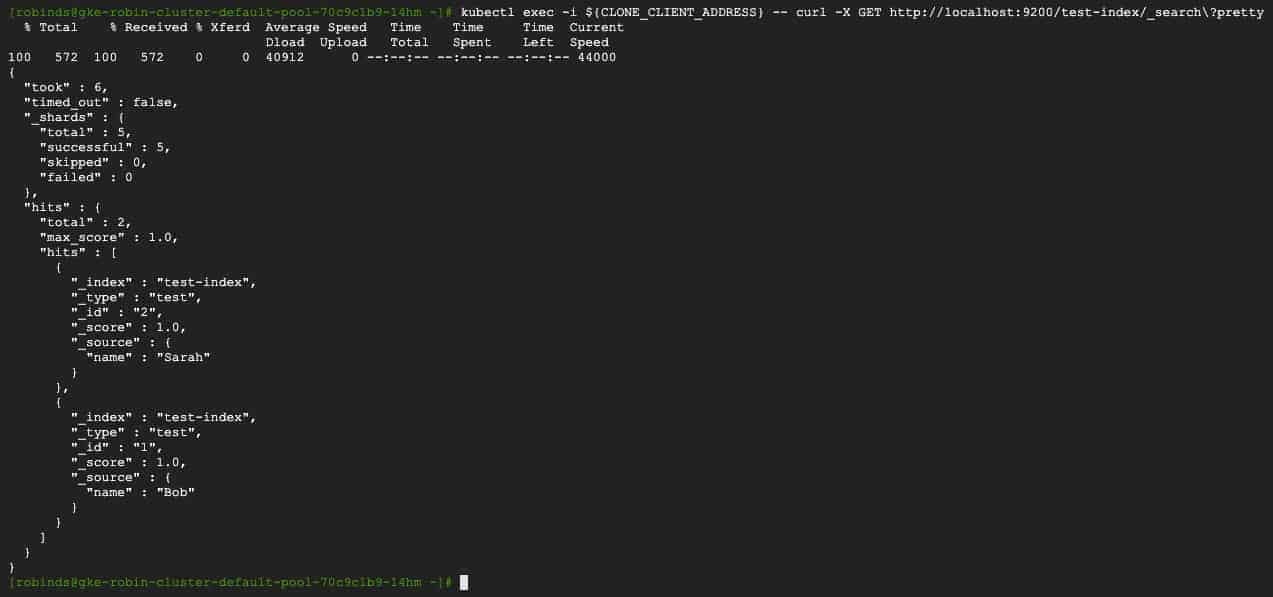
As you can see from the output above, a second user named ‘Sarah’ has been added.
To verify that our original ElasticSearch database is unaffected by changes to the clone, let us connect with our original ElasticSearch database and verify that it has not changed. Run the following command:
kubectl exec -i ${CLIENT_ADDRESS} -- curl -X PUT http://localhost:9200/test-index
You should see an output similar to the following, with only one record “Bob” in it.
As you can see from the output above, our original ElasticSearch database only has one user and thus was unaffected by the data insertion into the clone.
This means we can work on the original ElasticSearch database and the cloned database simultaneously without them affecting each other. This is valuable for collaboration across teams where each team needs to perform unique set of operations.
This concludes the clone ElasticSearch on GKE tutorial.
Deploy ElasticSearch on GKE Tutorial
Snapshot ElasticSearch on GKE Tutorial